iPhone Jailbreak
Looking for a perfect jailbreak solution? we’ve got you covered with the most trusted and up-to-date iPhone jailbreak methods, carefully matched to your device and iOS versions.
Find everything you need to know about iPhone jailbreaking all in one place!
What is jailbreaking?
Jailbreaking is the process of removing software restrictions imposed by Apple on iPhones, iPads, and other iOS devices. By doing this, users can gain full access to the operating system, allowing them to customize their devices, install third-party apps and tweaks not available on the App Store, and unlock features that Apple has restricted.
Prerequisites of jailbreaking
- Make sure that you have selected the jailbreak solution according to your device and iOS compatibility
- Keep a backup of your device’s data before you start jailbreak
- Follow the instructions before you start jailbreak
- Disable Find My iPhone
Benefits of jailbreaking
Customization:
- Change themes, icons, fonts, and layouts to personalize your device.
- Add widgets and custom controls to your home and lock screens.
Access to Third-Party Apps:
- Install apps not approved by Apple, including emulators, advanced file managers, and more.
Enhanced Functionality:
- Unlock hidden features like system-wide dark mode, call recording, and tethering.
- Use tweaks to improve performance or add shortcuts for frequently used actions.
Freedom from Restrictions:
- Remove carrier locks or region-based restrictions.
iPhone Jailbreak cons ( how to avoid jailbreak cons)
Security Risks
- Stick to trusted sources when downloading apps or tweaks; avoid unverified or unofficial repositories.
- Keep your jailbreak tools and tweaks up-to-date, as updates often address security vulnerabilities and fix bugs.
Loss of Warranty and Official Support
- If your jailbroken device experiences issues, restore it to its original state before contacting Apple for support.
Incompatibility with Software Updates
- Regularly back up your device to ensure you can easily restore or re-jailbreak it when needed.
- Hold off on updating to the latest iOS version until the jailbreak community confirms compatibility with your jailbreak tool.
Stability and Performance Issues
- Periodically remove unused tweaks and apps to maintain your device’s performance.
- Choose your tweaks and apps carefully, avoiding those that overlap or conflict with modifying system functionality.
- Always research and verify the compatibility of tweaks and apps before installation.
iPhone jailbreak methods
Tethered Jailbreak
- A tethered jailbreak requires the device to be connected to a computer or external device every time it is powered on or rebooted. Without this connection, the device cannot fully boot into the jailbroken state. Examples: Sn0wBreeze, RedSn0w
Untethered Jailbreak
- An untethered jailbreak allows the device to turn on and off freely without losing its jailbroken state. Once this method is applied, the device will always boot directly into a jailbroken state. Examples: Evasi0n, TaiG
Semi-Untethered Jailbreak
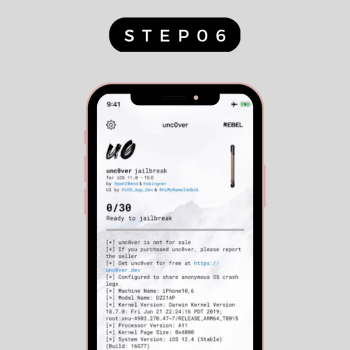
- A semi-untethered jailbreak is a mix of tethered and untethered methods. The device can reboot without connecting to a computer or jailbreak tool, but it will boot into a non-jailbroken state by default. The user must launch a jailbreak app on the device to reactivate the jailbroken mode after each reboot. Examples: Unc0ver, Chimera, Checkra1n
Most up-to-date iPhone jailbreak methods
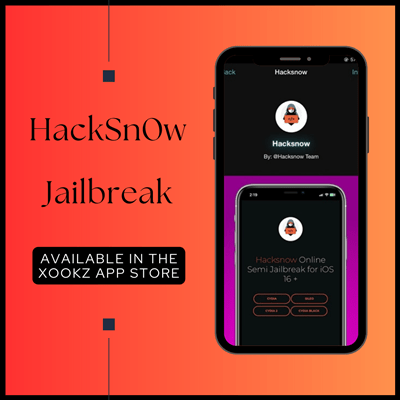
Hacksnow Online Jailbreak
Hacksnow online jailbreak is the most popular and the latest jailbreak method compatible with latest iPhone models including iPhone 16 jailbreak. Hacksnow jailbreak allows you to install four package managers including Cydia 2, Cydia dark, Cydia lite and Sileo lite. Becuase this is an online jailbreak method you can easily complete the jailbreak process.
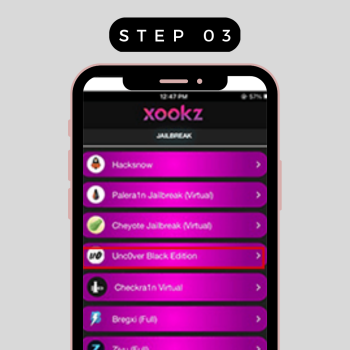
Step guide
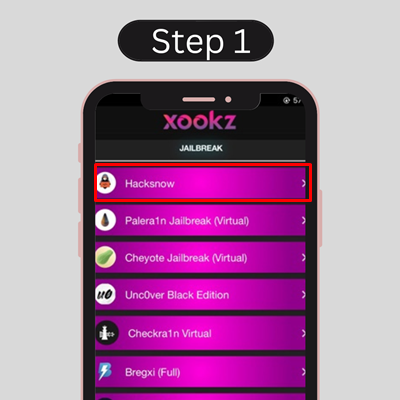
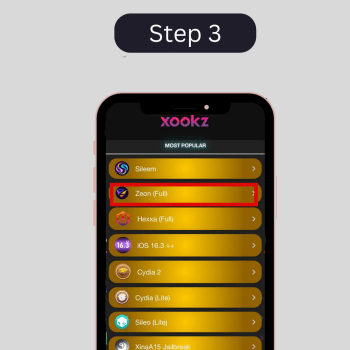
- Click on the above button to download the Xookz app store. and you can see HackSnow jailbreak tool is in jailbreak category. Tap on this.
2. And then you can see the install button on the top right side in this. Tap on this.
3. then you can see open new window and you can see allow and ignore such as two solutions with a message on this
4. Then tap on allow button > close and wait to download HackSnow from your device settings.
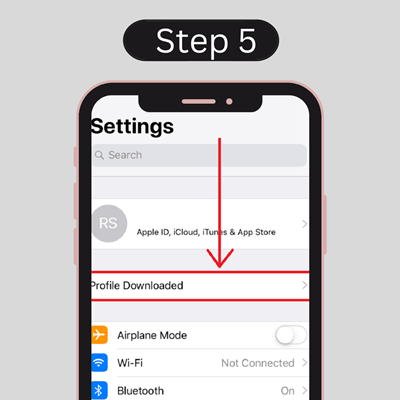
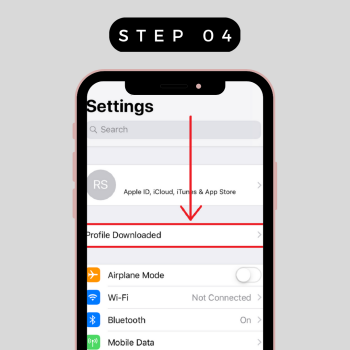
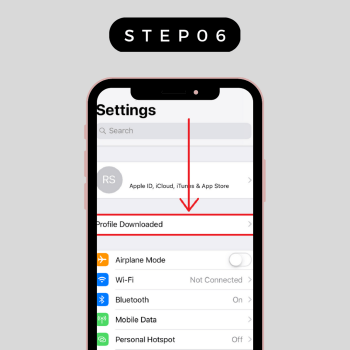
5. Go to device setting and tap on profile download
6. You can see HackSnow download from here and tap the install button on the right top after going to this.
7. Then provide your device passcode and tap on install button > done.
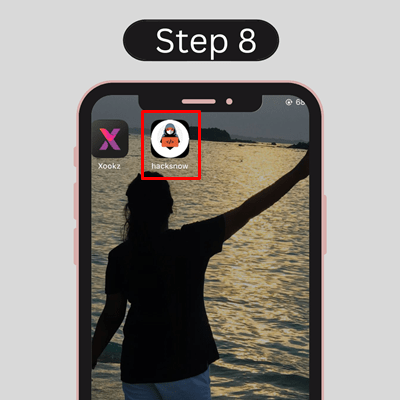
8. You can see the HackSnow app on your home screen after the above process.
9. Go to the HackSnow jailbreak app. Then you can see the “Start button”. Tap on this.
10. Then you will see the “continue” button and “jailbreak successful!” The message can be seen.

11. You can see all application managers like cydia, cydia 2, cydia black, Sileo.
12. Click here to go to the installation guide of each package manager.
Device Compatibility
iPhone 16, iPhone 16 plus, iPhone 16 pro, iPhone 16 pro max, iPhone 15, iPhone 15 plus, iPhone 15 pro, iPhone 15 pro max, iPhone 14, iPhone 14 Plus, iPhone 14 Pro, iPhone 14 Pro Max, iPhone 13, iPhone 13 mini, iPhone 13 Pro, iPhone 13 Pro Max, iPhone 12 Mini, iPhone 12, iPhone 12 Pro and iPhone 12 Pro Max, iPhone 11 Pro Max, iPhone 11 Pro, iPhone 11, iPhone XR, iPhone XS , iPhone XS Max, iPhone X, iPhone 8 / 8 Plus
iOS versions Compatibility
iOS 18.3 beta, iOS 18.2.1, iOS 18.2 , iOS 18.1.1, iOS 18.1 , iOS 18.0.1, iOS 18 , iOS 17.7.2, iOS 17.7.1, iOS 17.7, iOS 17.6.1, iOS 17.6, iOS 17.5.1, iOS 17.5, iOS 17.4.1, iOS 17.4, iOS 17.3.1, iOS 17.3 , iOS 17.2.1, iOS 17.2, iOS 17.1, iOS 17.0.3, iOS 17.0.2, iOS 17.0.1, iOS 17, iOS 16.7.10, iOS 16.7.9, iOS 16.7.8, iOS 16.7.7, iOS 16.7.6, iOS 16.7.5 , iOS 16.7.4, iOS 16.7.3, iOS 16.7.2, iOS 16.7.1, iOS 16.7, iOS 16.6, iOS 16.5, iOS 16.4.1, iOS 16.4, iOS 16.3.1, iOS 16.3, iOS 16.2, iOS 16.1.1, iOS 16.1, iOS 16.0.3, iOS 16.0.2, iOS 16.0.1, iOS 16.6, iOS 16.6.1
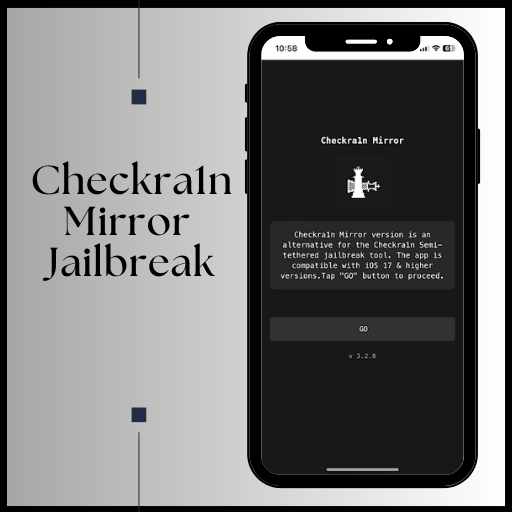
Checkra1n Mirror Jailbreak
Checkar1n mirror jailbreak is another latest online jailbreak method compatible with installing Cydia after completing the jailbreak process. Checkra1n mirror jailbreak process is now popular among jailbreak users because of the trusterworthyness and usability.
- Go to the Xookz app store from your iPhone.
- You can see the Checkra1n mirror application
- Click on this. Then you can see the install button on the top right side in this
- Then tap on this and you can see allow and ignore such as two solutions with a message. You can choose the allow button from these.
- Go to device settings and tap on profile download.
- You can see the Checkra1n mirror download here and tap on this.
- Then provide your device passcode and tap on the install button.
- You can see the Checkra1n mirror app on your home screen after the above process.
- Open the Checkra1n mirror >> Click on the GO button
- Click on the GET THE APP CODE button, after opening the downloaded CodeGen app >> tap on the hold to copy
- Then open the Checkra1n mirror app again >> past the code there >> continue >> run exploit.
- Install Cydia client >> allow >> close the profile window >> go to settings >> install >> provide the device passcode >> install >> done.
Compatible Devices – iPhone 16 Pro Max, iPhone 16 Pro, iPhone 16 Plus, iPhone 16, iPhone 15 Pro Max, iPhone 15 Pro, iPhone 15 Plus, iPhone 15, iPhone 14 Pro Max, iPhone 14 Pro, iPhone 14 Plus, iPhone 14, iPhone SE, iPhone 13 Pro Max, iPhone 13 Pro, iPhone 13, iPhone 13 mini, iPhone 12 Pro Max, iPhone 12 Pro, iPhone 12, iPhone 12 mini, iPhone SE (gen 2), iPhone 11 Pro Max, iPhone 11 Pro, iPhone 11, iPhone XS Max, iPhone XS, iPhone XR, iPhone X, iPhone SE
Compatible versions – iOS 18.3 beta 2, iOS 18.2.1, iOS 18.2 , iOS 18.1.1, iOS 18.1 , iOS 18 , iOS 17.7.2, iOS 17.7.1, iOS 17.7, iOS 17.6.1, iOS 17.6, iOS 17.5.1, iOS 17.5, iOS 17.4.1, iOS 17.4, iOS 17.3.1, iOS 17.3, iOS 17.2.1, iOS 17.2, iOS 17.1, iOS 17.0.3, iOS 17.0.2, iOS 17.0.1, iOS 17
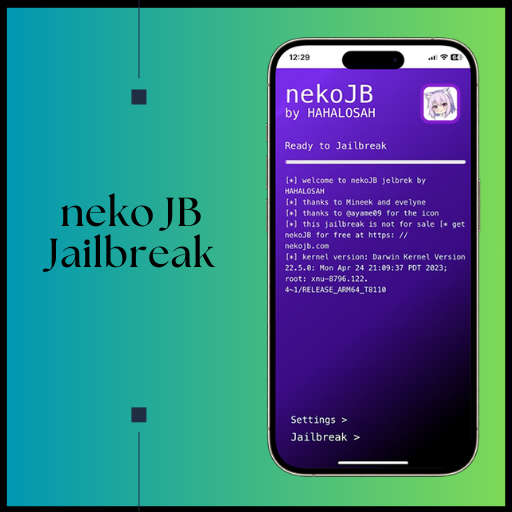
Neko JB Jailbreak
Neko JB jailbreak is compatible with latest iPhone jailbreak including iPhone 16 devices. This is also an online jailbreak method because of that users can get new enhasements and features without any problem.
Step 1: Download the Neko Online tool from the link below. Use the Safari browser, as other browsers might not work well.
Step 2: Open the Neko Online app from your home screen.
Step 3: Tap the “Jailbreak” button to start the process.
Step 4: Once the jailbreak is finished, you’ll see a new app called NekoUtil.
Step 5: Now you can install your favorite jailbreak app manager, like Sileo, Zebra, or Cydia.
Compatible Devices – iPhone 16 Pro Max, iPhone 16 Pro, iPhone 16 Plus, iPhone 16, iPhone 15, iPhone 15 Plus, iPhone 15 Pro, and iPhone 15 Pro Max, iPhone 14, iPhone 14 Plus, iPhone 14 Pro, iPhone 14 Pro max, iPhone 13, iPhone 13 Pro, iPhone 13 Pro, iPhone 13 Mini, iPhone 12 Mini, iPhone 12, iPhone 12 Pro, iPhone 12 Pro Max, iPhone 11, iPhone 11 Pro, iPhone 11 pro max, iPhone XS, iPhone XS Max, iPhone XR, iPhone X, iPhone 8, iPhone 8 Plus, iPhone 7, iPhone 7 Plus
Compatible versions – iOS 18.3 beta 2, iOS 18.2.1, iOS 18.2 , iOS 18.1.1, iOS 18.1 , iOS 18
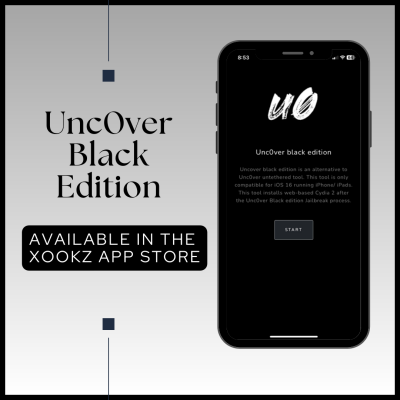
Unc0ver Black Edition
Unc0ver Black edition is compatible with iOS 16 and higher versions as well as all current device models, including the iPhone 14. This virtual iPhone jailbreak solution supports installing Cydia dark once jailbreaking is finished.
Step guide
- Click on ” Install Unc0ver Black“
- Xookz app store will downloaded
- Open Xookz app tap on Download UncOver Black Edition
4. Go to device settings > click on install > allow > close
5. Unc0ver Black will appear on home screen
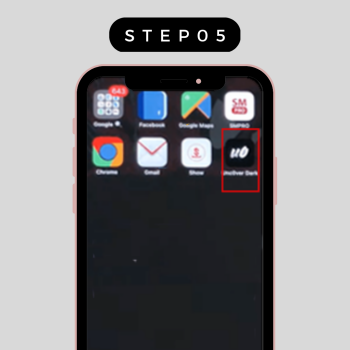
6. Open Unc0ver Black Edition
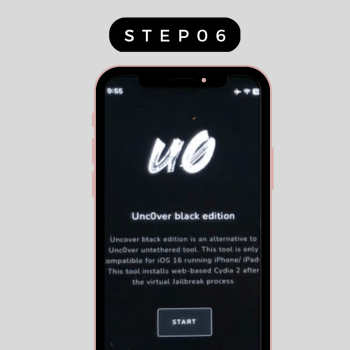
7. Tap on Jailbreak >wait until the jailbreak process completed >Cydia dark will be automatically display on your home screen
6. Open Unc0ver Virtual Jailbreak
7. Tap on Jailbreak >wait until the jailbreak process completed >Cydia lite will be automatically displayed on your home screen.
Compatible iOS versions
iOS16, iOS16.0.1, iOS16.0.2, iOS16.0.3, iOS16.1, iOS16.1.1, iOS16.1.2 and iOS16.2, iOS16.3, iOS16.3.1, iOS16.4 ,iOS 16.5, iOS 16.6, iOS 16.6.1, iOS 16.7, iOS 16.7.1, iOS 16.7.2, iOS 16.7.3, iOS 16.7.4, iOS 16.7.5, iOS 16.7.6, iOS 16.7.7, iOS 16.7.8, iOS 16.7.9, iOS 16.7.10, iOS 17.0, iOS 17.0.1, iOS 17.0.2, iOS 17.0.3, iOS 17.1, iOS 17.1.1, iOS 17.1.2, iOS 17.2, iOS 17.2.1, iOS 17.3, iOS 17.3.1, iOS 17.4, iOS 17.4.1, iOS 17.5, iOS 17.5.1, iOS 17.6, iOS 17.6.1, iOS 17.7, iOS 17.7.1, iOS 17.7.2, iOS 18 , iOS 18.0.1, iOS 18.11, iOS 18.1 , iOS 18.2,iOS 18.2.1, iOS 18.3, iOS 18.3.1,iOS 18.3.2, iOS 18.4, iOS 18.4.1, iOS 18.5 , iOS 18.3.1,iOS 18.3.2, iOS 18.4, iOS 18.4.1, iOS 18.5 , iOS 18.6 beta, iOS 26 beta
Compatible device
iPhone 16 Pro Max, iPhone 16 Pro, iPhone 16 Plus, iPhone 16, iPhone 15, iPhone 15 Plus, iPhone 15 Pro, and iPhone 15 Pro Max, iPhone 14, iPhone 14 Plus, iPhone 14 Pro, iPhone 14 Pro max, iPhone 13, iPhone 13 Pro, iPhone 13 Pro, iPhone 13 Mini, iPhone 12 Mini, iPhone 12, iPhone 12 Pro, iPhone 12 Pro Max, iPhone 11, iPhone 11 Pro, iPhone 11 pro max, iPhone XS, iPhone XS Max, iPhone XR, iPhone X, iPhone 8, iPhone 8 Plus, iPhone 7, iPhone 7 Plus, iPhone 6s, iPhone 6s Plus, iPhone 6, iPhone 6 Plus, iPhone SE
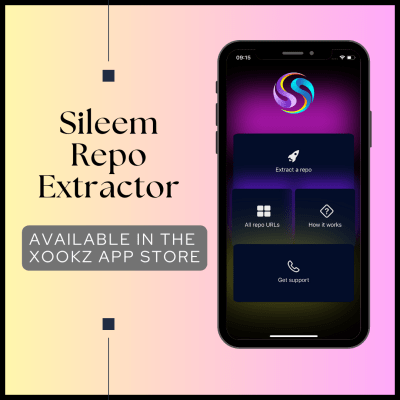
Sileem
Sileem is a repo extractor, a totally online Jailbreak iPhone method, and does not require system root to use during jailbreaking. All current iPhone device models including the iPhone 14 devices, are compatible with Sileem, which is also compatible with iOS 16 and higher versions.
Step guide
Step 1. Tap on above “Install Sileem“
Step 2. Xookz app will download first
Step 3.Go to device settings> enter device password>install > allow > close
Step 4 .Open Xookz > select Sileem and download Sileem

Step 5 . Sileem app will download to the device settings
Step 6 .Tap on device settings> profile download> enter device password> install> allow> close
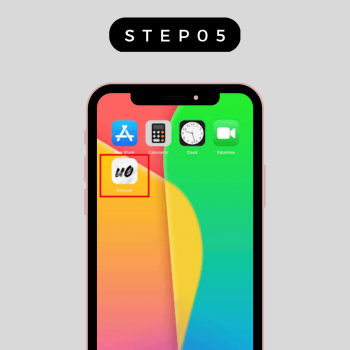
Step 7 .Sileem will appear on home screen
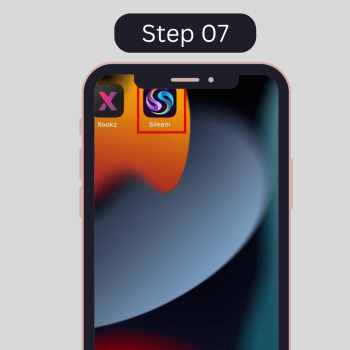
Step 8 .Open Sileem
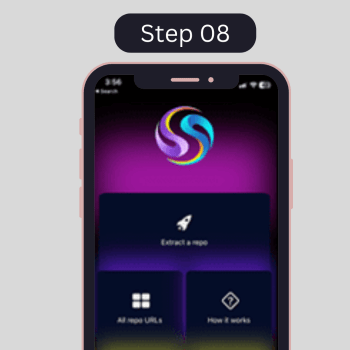
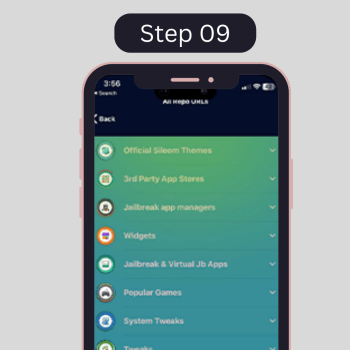
Step 9 .Go to “all repos Urls” and copy a link that you wish to install
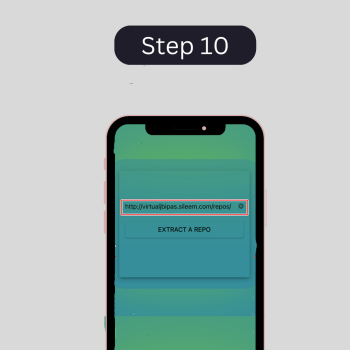
Step 10 . Paste the link in Extract repos option
Compatible iOS versions
iOS 17.0, iOS 17.0.1, iOS 17.0.2, iOS 17.0.3, iOS 17.1, iOS 17.1.1, iOS 17.1.2, iOS 17.2, iOS 17.2.1, iOS 17.3, iOS 17.3.1, iOS 17.4, iOS 17.4.1, iOS 17.5, iOS 17.5.1, iOS 17.6, iOS 17.6.1,iOS 17.7 iOS 17.7.1, iOS 17.7.2, iOS 18 , iOS 18.0.1, iOS 18.1.1, iOS 18.1 , iOS 18.2, iOS 18.2.1, iOS 18.3 , iOS 18.3.1, iOS 18.3.2, iOS 18.4, iOS 18.4.1, iOS 18.5, iOS 26
iOS 16.7.10, iOS 16.7.9, iOS 16.7.8, iOS 16.7.7, iOS 16.7.6, iOS 16.7.5, iOS 16.7.4, iOS 16.7.3, iOS 16.7.2, iOS 16.7.1, 16.7, iOS 16.6.1, iOS 16.6, iOS 16.5, iOS 16.4.1, iOS 16.4, iOS 16.3.1, iOS 16.3, iOS 16.2, iOS 16.1.2, iOS 16.1.1, iOS 16.1, iOS 16.0.3, iOS 16.0.2, iOS 16.0.1, iOS 16z
Compatible device
iPhone 16 Pro Max, iPhone 16 Pro, iPhone 16 Plus, iPhone 16, iPhone 15, iPhone 15 Plus, iPhone 15 Pro, and iPhone 15 Pro Max, iPhone 14, iPhone 14 Plus, iPhone 14 Pro, iPhone 14 Pro Max, iPhone 13, iPhone 13 mini, iPhone 13 Pro, iPhone 13 Pro Max, iPhone 12 Mini, iPhone 12, iPhone 12 Pro and iPhone 12 Pro Max, iPhone 11 Pro Max, iPhone 11 Pro, iPhone 11, iPhone XR, iPhone XS , iPhone XS Max, iPhone X, iPhone 8 / 8 Plus, iPhone 7 / 7 Plus
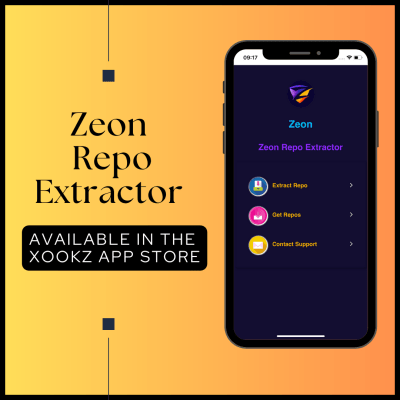
Zeon
Zeon is an entirely online iPhone jailbreak solution that does not require a computer and it works with all device types and iOS 14 and later versions.Zeon repo extractor supports installing recently released wallpapers, modifications, themes, games and much more that you are interested in.
Step Guide
Step 01 – Click on above “Install Zeon”
Step 02 – Xookz app store will downloaded
Step 03 – Open Xookz app tap on Download Zeon
Step 04 – Go to device settings > click on install > allow > close

Step 5 . Zeon will appear on home screen
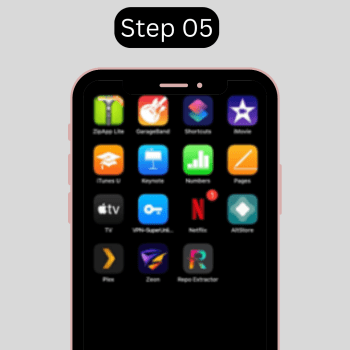
Step 6 – Open Zeon
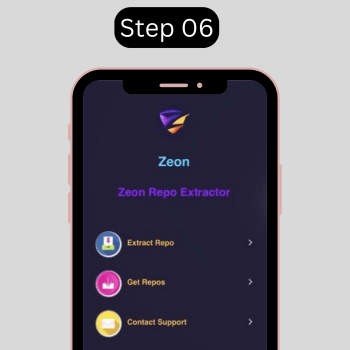
Step 7 – Go to Get Repos option
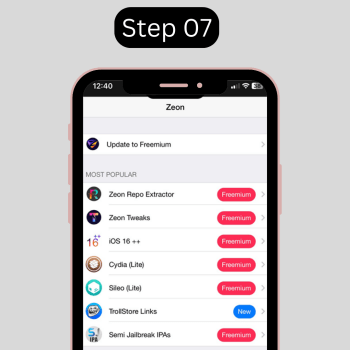
Step 8 – Copy a link that wishes to get in to your device > Paste the link in Extract a repo > Click on “Extract” button
Compatible iOS versions iOS 17.0, iOS 17.0.1, iOS 17.0.2, iOS 17.0.3, iOS 17.1, iOS 17.1.1, iOS 17.1.2, iOS 17.2, iOS 17.2.1, iOS 17.3, iOS 17.3.1, iOS 17.4, iOS 17.4.1, iOS 17.5, iOS 17.5.1, iOS 17.6, iOS 17.6.1,iOS 17.7, iOS 17.7.1, iOS 17.7.2, iOS 18 , iOS 18.0.1, iOS 18.1 , iOS 18.2, iOS 18.2.1, iOS 18.3, iOS 18.3.1, iOS 18.3.2, iOS 18.4, iOS 18.4.1, iOS 18.5, iOS 26
iOS 16.7.10, iOS 16.7.9, iOS 16.7.8, iOS 16.7.7, iOS 16.7.6, iOS 16.7.5, iOS 16.7.4, iOS 16.7.3, iOS 16.7.2, iOS 16.7.1, 16.7, iOS 16.6.1iOS 16.5, iOS 16.4.1, iOS 16.4, iOS 16.3.1, iOS 16.3, iOS 16.2, iOS 16.1.2, iOS 16.1.1, iOS 16.1, iOS 16.0.3, iOS 16.0.2, iOS 16.0.1, iOS 16, iOS 15.7.6, iOS 15.7.5, iOS 15.7.4, iOS 15.7.3, iOS 15.7.2, iOS 15.7.1, iOS 15.7, iOS 15.6.1, iOS 15.6, iOS 15.5, iOS 15.4.1, iOS 15.4, iOS 15.3.1, iOS 15.3, iOS 15.2.1, iOS 15.2, iOS 15.1.1, iOS 15.1, iOS 15.0.2, iOS 15.0.1, iOS 15, iOS 14.8.1, iOS 14.8, iOS 14.7.1, iOS 14.7, iOS 14.6, iOS 14.5.1, iOS 14.5, iOS 14.4.2, iOS 14.4.1, iOS 14.4, iOS 14.3, iOS 14.2.1, iOS 14.2, iOS 14.1, iOS 14.0.1, iOS 14
Compatible device
All iPhone device models are compatible with Zeon repo extractor
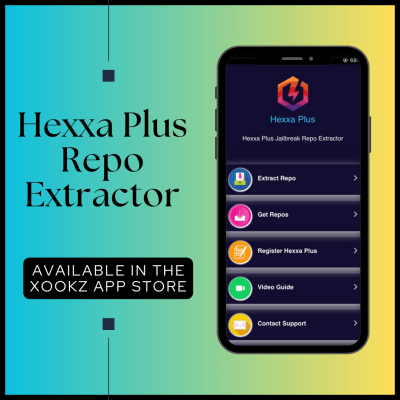
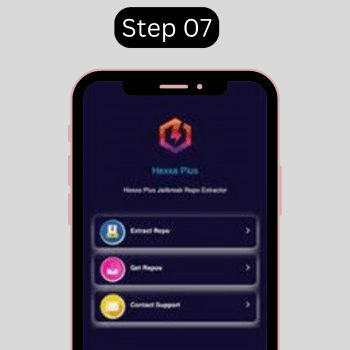
Hexxa Plus
Hexxa Plus repo extractor working without a PC Jailbreak. You may download a fresh selection of modifications, games, wallpapers, and intriguing features from this jailbreak repo extractor. This repo extractor works with iOS 16 and higher versions, in addition to iOS 14 – iOS 14.8.1 and iOS 15 – iOS 15.7.6.
Step guide
Step 01 – Click on above “Install HexxaPlus“
Step 02 – Xookz app store will downloaded
Step 03 – Open Xookz app store
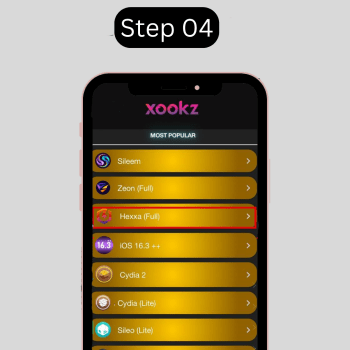
Step 04 – Tap on Download Hexxa Plus
Step 05 – Go to device settings > click on install > allow > close

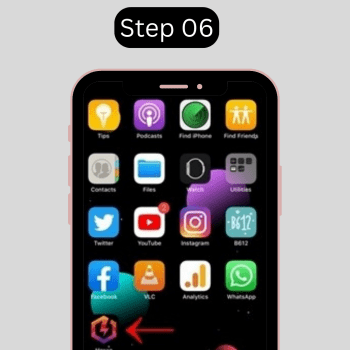
Step 06 – . Hexxa Plus will appear on home screen
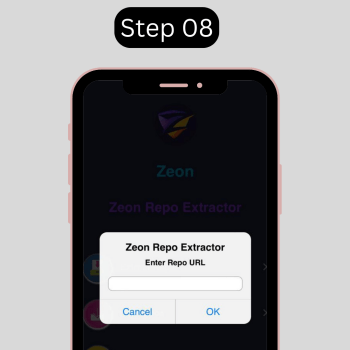
Step 07 – Open Hexxa Plus
Step 08 – Go to All Repos URLs
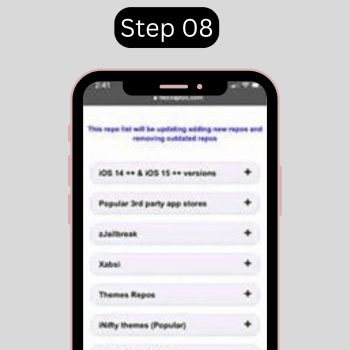
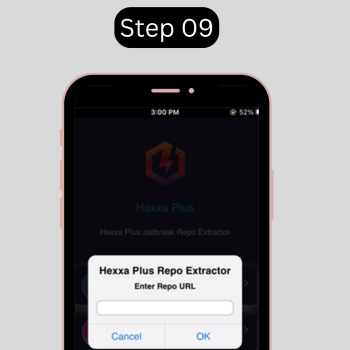
Step 09 – Copy a link that wishes to get into your device > Paste the link in Extract a repo > Click on “OK” button
Compatible iOS versions
iOS16, iOS16.0.1, iOS16.0.2, iOS16.0.3, iOS16.1, iOS16.1.1, iOS16.1.2 and iOS16.2, iOS16.3, iOS16.3.1, iOS16.4 ,iOS 16.5, iOS 16.6, iOS 17.0, iOS 17.0.1, iOS 17.0.2, iOS 17.0.3, iOS 17.1, iOS 17.1.1, iOS 17.1.2, iOS 17.2, iOS 17.2.1, iOS 17.3, iOS 17.3.1, iOS 17.4, iOS 17.4.1, iOS 17.5, iOS 17.5.1, iOS 17.6, iOS 17.6.1,iOS 17.7, iOS 17.7.1, iOS 17.7.2, iOS 18 , iOS 18.0.1, iOS 18.1.1, iOS 18.1 , iOS 18.2, iOS 18.2.1, iOS 18.3, iOS 18.3.1, iOS 18.3.2, iOS 18.4, iOS 18.4.1, iOS 18.5, iOS 26
iOS 16.7.10, iOS 16.7.9, iOS 16.7.8, iOS 16.7.7, iOS 16.7.6, iOS 16.7.5, iOS 16.7.4, iOS 16.7.3, iOS 16.7.2, iOS 16.7.1, 16.7, iOS 16.6.1
iOS 15.7.2, iOS 15.7.1, iOS 15.7, iOS 15.6.1, iOS 15.6, iOS 15.5, iOS 15.4.1, iOS 15.4, iOS 15.3.1, iOS 15.3, iOS 15.2.1, iOS 15.2, iOS 15.1.1, iOS 15.1, iOS 15.0.2, iOS 15.0.1, iOS 15, iOS 14.8.1, iOS 14.8, iOS 14.7.1, iOS 14.7, iOS 14.6, iOS 14.5.1, iOS 14.5, iOS 14.4.2, iOS 14.4.1, iOS 14.4, iOS 14.3, iOS 14.2.1, iOS 14.2, iOS 14.1, iOS 14.0.1, iOS 14
Compatible device
iPhone 16 device models, iPhone 15 device models, iPhone 14 device models, iPhone 13, iPhone 13 mini, iPhone 13 Pro, iPhone 13 Pro Max, iPhone 12 Mini, iPhone 12, iPhone 12 Pro and iPhone 12 Pro Max, iPhone 11 Pro Max, iPhone 11 Pro, iPhone 11, iPhone XR, iPhone XS , iPhone XS Max, iPhone X, iPhone 8 / 8 Plus, iPhone 7 / 7 Plus, iPhone 6S / 6S Plus, iPhone 6 / 6 Plus, iPhone 5S, iPhone 5C, iPhone 5
iPhone Jailbreak app managers
A jailbreak app manager is a program or application that allows users to add themes, tweaks, and customizations to their jailbroken iPhones. These managers are essential tools for unlocking the full potential of a jailbroken device. The most well-known jailbreak app managers are Cydia, Sileo, Sileo 2, Cydia 2, and Zebra.
Cydia
Cydia is one of the original and most widely used package managers for jailbroken devices. It enables users to install third-party apps, customizations, games, and tweaks not available in the official App Store.
Popular Cydia Tweaks:
- One Setting: This tweak brings the Samsung One UI’s look and feel to iOS. It also allows users to hide the iCloud account and search bar, giving a cleaner interface.
- IWantTranslucent: Enhances the 3D Touch context menu on iOS 15 and 16 by replacing its default effect with a sleek, transparent appearance.
- YTHoldForSpeed: Lets users adjust YouTube video playback speed by pressing and holding the video player. It also includes an option to automatically apply a preferred speed when a new video starts.
Cydia 2
Cydia 2 is an updated version of the classic Cydia, designed for a smoother, more modern user experience. It retains the original’s rich repository system while improving speed and usability for newer iOS versions.
Sileo
Sileo is a modern package manager designed as a replacement for both Cydia and the App Store. It offers a sleek, user-friendly interface for discovering and managing jailbreak tweaks, apps, and customizations.
Popular Sileo Tweaks:
- Good WiFi: Displays advanced Wi-Fi network details, including MAC Address, WPA type, channel in use, and signal strength.
- iCleaner Pro: Boosts device performance by cleaning unnecessary files and freeing up storage.
- PinAnim: Assigns four unique animation effects to your iPhone, adding a touch of personalization.
Sileo 2
Sileo 2 is the next-generation package manager, offering improved speed, features, and user experience. It’s built to work seamlessly with newer jailbreak tools and rootless jailbreak environments.
Key Features:
- Optimized performance for managing tweaks on modern devices.
- Enhanced search functionality for finding tweaks quickly.
Zebra
Zebra is a lightweight and efficient package manager designed to work alongside or as an alternative to Cydia and Sileo. It is known for its simplicity and speed, appealing to users who want a no-frills jailbreak app manager.
Popular Zebra Tweaks:
Zebra emphasizes a clutter-free and responsive experience, making it ideal for those who value efficiency.
Jailbreak Old iPhones
The term “Old iPhones” refers to earlier generations of iPhone models that have been surpassed by newer releases. As technology evolves, Apple regularly introduces new iPhone models with enhanced features, updated designs, and improved hardware capabilities.
With the release of iOS 17.5, this update is only compatible with iPhone XS and later models. Devices that do not meet this requirement are categorized as older models.
Below is a list of old iPhone models and the jailbreak tools compatible with them.
| Device | Released year | Compatible Jailbreak tool |
| iPhone X | 2017 | Sileem, Zeon |
| iPhone 8, 8 plus | 2017` | Hexxa Plus |
| iPhone 7, 7 plus | 2016 | Unc0ver virtual |
| iPhone 6s, 6S plus | 2015 | Unc0ver tool |
| iPhone 6, 6 plus | 2014 | Unc0ver semi-tethered jailbreak |
| iPhone 5s | 2013 | Checkra1n semi-tethered jailbreak |
How to reverse jailbreaking
Follow the general instructions below to remove the jailbreak and restore the iPhone to its original form.
Step 01 – Backup your data
Before beginning the restoration process, make a backup of your iPhone’s data. You may backup your iPhone using iCloud or iTunes
Step 02 – Update the iOS version
By updating your device to the most recent iOS update, the jailbreak will be instantly removed from your iPhone
Step 03 – Erase all content and setting
On Your iPhone navigate to settings > General> reset > Erase all content and settings > input device password to confirm. After this procedure is done, your device will return to performance.
Step 04 – Recovery from backups
After removal of the content and settings, you will be sent to the recovery. procedure of your device. this recovery process also makes your device back to normal.
iPhone Jailbreak FAQ
1. What is jailbreaking an iPhone?
Jailbreaking is the process of removing software restrictions imposed by Apple on iOS devices. It allows users to install third-party apps, tweaks, themes, and customizations that are not available in the official App Store.
2. Is jailbreaking legal?
In many countries, jailbreaking is legal for personal use, as it falls under copyright exceptions. However, Apple discourages jailbreaking, and it may void your device’s warranty. Be sure to check the laws in your region.
3. Can jailbreaking damage my iPhone?
While jailbreaking itself doesn’t usually damage the hardware, incorrect steps or using untrusted tools can lead to software issues, such as a bricked device. Always follow trusted guides and back up your data before jailbreaking.
4. Will jailbreaking delete my data?
No, jailbreaking doesn’t delete your data. However, it’s strongly recommended to back up your device before starting, in case something goes wrong.
5. Can I reverse a jailbreak?
Yes, you can reverse a jailbreak by restoring your iPhone to its original factory settings using iTunes or Finder. This will remove all jailbreak tweaks and return the device to a non-jailbroken state.
6. Can I update my iPhone after jailbreaking?
Updating a jailbroken device to a new iOS version will remove the jailbreak. Before updating, confirm that the new iOS version is compatible with your jailbreak tool, or wait for a jailbreak tool update.
7. How can I protect my jailbroken iPhone from security threats?
- Only install tweaks and apps from trusted sources.
- Keep your jailbreak tools and tweaks updated.
- Avoid granting unnecessary permissions to apps.
- Use additional security measures like strong passwords.
8. What happens if my jailbroken iPhone gets stuck or bricked?
If your device gets stuck in a boot loop or becomes unresponsive, you can try:
- Booting into safe mode to uninstall problematic tweaks.
- Restoring your device using iTunes or Finder.
- Following troubleshooting guides specific to your jailbreak tool.
9. Are all iPhones compatible with jailbreaking?
No, compatibility depends on the iOS version and the jailbreak tool used. For example, iOS 17.5 is compatible only with iPhone XS and later models. Older devices require specific jailbreak tools.